19. Python Wordcloud Tutorial
By Bernd Klein. Last modified: 01 Feb 2022.
Introduction
Word Clouds (WordClouds) are quite often called Tag clouds, but I prefer the term word cloud. It think this term is more general and easier to be understood by most people. The term tag is used for annotating texts and especially websites. This means finding out the most important words or terms characterizing or classifying a text. In the early days of web development people had to tag their websites so that search engines could easier classify them. Spemmer used this to manipulate the search engines by giving incorrect or even misleading tags so that their websites ranked higher. Google changed this by automatically finding out the importance of the text components. Google more or less disregarding the tags which the owners of the websites assigned to their pages. "Word clouds" as we use them also find out automatically what are the most important words. Of course, we do it naively by just counting the number of occurrances and using stop words. This is not the correct way to find out about the "real" importance of words, but leads to very interesting results, as we will see in the following.
We still haven't defined what a "word cloud" is. It is a visual representation of text data. Size and colors are used to show the relative importance of words or terms in a text. The bigger a term is the greater is its weight. So the size reflects the frequency of a words, which may correspond to its importance.
We will demonstrate in this tutorial how to create you own WordCloud with Python. We will use the Python modules Numpy, Matplotlib, Pillow, Pandas, and wordcloud in this tutorial.
The module wordcloud is not part of most of the Python distribution. If you use Anaconda, you can easily install it with the shell command
conda install -c conda-forge wordcloud
Unfortunately, this is not enough for all the things we are doing in this tutorial. So you will have to install the latest version from github:
git clone https://github.com/amueller/word_cloud.git
cd word_cloud
pip install .
# importing the necessary modules:
import numpy as np
import pandas as pd
from wordcloud import WordCloud, STOPWORDS, ImageColorGenerator

import matplotlib.pyplot as plt
from PIL import Image
text = open("data/peace_and_love.txt").read()

wordcloud = WordCloud().generate(text)

# Display the generated image:
plt.imshow(wordcloud)
plt.axis("off")
plt.show()
We will play around with the numerous parameters of WordCloud. We create a square picture with a transparant background. We also increase the likelihood of vertically oriented words by setting prefer_horizontal to 0.5 instead of 0.9 which is the default:
wordcloud = WordCloud(width=500,
                      height=500,
                      prefer_horizontal=0.5,
                      background_color="rgba(255, 255, 255, 0)",
                      mode="RGBA").generate(text)

plt.imshow(wordcloud)
plt.axis("off")
plt.show()
wordcloud.to_file("img_dir/peace_and_love.png")
OUTPUT:
<wordcloud.wordcloud.WordCloud at 0x7f59ebbc0670>
wordcloud = WordCloud().generate(text)

# Display the generated image:
plt.imshow(wordcloud)
plt.axis("off")
plt.show()
We will show in the following how we can create word clouds with special shapes. We will use the shape of the dove from the following picture:
dove_mask = np.array(Image.open("img_dir/dove.png"))
#dove_mask[230:250, 240:250]
plt.imshow(dove_mask)
plt.axis("off")
plt.show()
We will create in the following example a wordclous in the shape of the previously loaded "peace dove". If the parameter repeat is set to True the words and phrases will be repeated until max_words (default 200) or min_font_size (default 4) is reached.
wordcloud = WordCloud(background_color="white",
                      mask=dove_mask,
                      contour_width=3,
                      repeat=True,
                      min_font_size=3,
                      contour_color='darkgreen')

# Generate a wordcloud
wordcloud.generate(text)

# store to file
wordcloud.to_file("img_dir/dove_wordcloud.png")

# show

plt.imshow(wordcloud)
plt.axis("off")
plt.show()
We will use now a colored mask with christmas bubles to create a word cloud with differenctly colored areas:
The following Python code can be used to create the colored wordcloud. We visualize the result with Matplotlib:
balloon_mask = np.array(Image.open("img_dir/balloons.png"))

image_colors = ImageColorGenerator(balloon_mask)

wc_balloons = WordCloud(stopwords=STOPWORDS,
                        background_color="white",
                        mode="RGBA",
                        max_words=1000,
                        #contour_width=3,
                        repeat=True,
                        mask=balloon_mask)

text = open("data/birthday_text.txt").read()
wc_balloons.generate(text)
wc_balloons.recolor(color_func = image_colors)

plt.imshow(wc_balloons)
plt.axis("off")
plt.show()
So that it looks better, we overlay this picture with the original picture of the balloons!
balloons_img = Image.fromarray(wc_balloons.to_array())
balloon_mask_img = Image.fromarray(balloon_mask)

new_img = Image.blend(balloons_img,
                      balloon_mask_img,
                      0.5)
new_img.save("balloons_with_text.png","PNG")
plt.imshow(new_img)
plt.axis("off")
plt.show()
Live Python training
See our Python training courses
Exercises
When I created the wordcloud tutorial it was the 23rd of December. This explains why the exercises are dealing with Christmas. Actually, I used the pictures as Christmas cards. So, you wil lbe able to create your customized Christmas and birthday card with Python!
Exercise 1
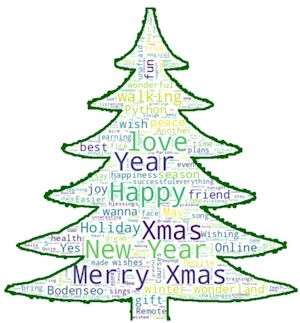
Create a wordcloud in the shape of a christmas tree with Python. You can use the following black-and-white christmas tree for this purpose:
We also provided a text filled with words related to Xmas:
Exercise 2
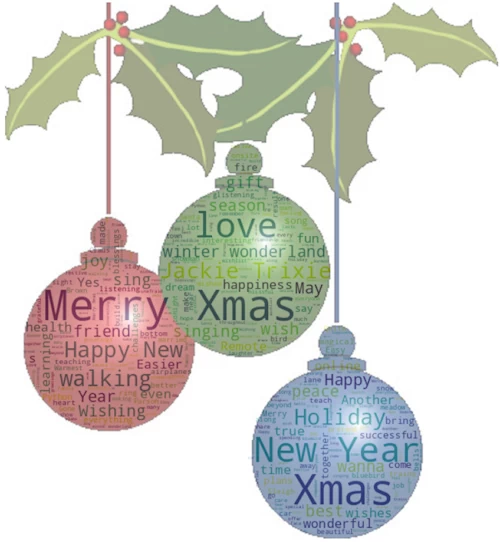
This exercise is Xmas related as well. This time, you may use the pictures
The first one can be used to create the wordcloud:
The second one can be overlayed with the wordcloud:
christmas_tree_bulbs_leaves.jpg
Solutions
Solution to Exercise 1
# load Chrismas tree mask
xmas_tree_mask = np.array(Image.open("img_dir/xmas_tree.png"))


text = open("data/xmas.txt").read()

wc = WordCloud(background_color="white",
               max_words=1000,
               mask=xmas_tree_mask,
               repeat=True,
               stopwords=STOPWORDS,
               contour_width=7,
               contour_color='darkgreen')

# Generate a wordcloud
wc.generate(text)

# store to file
wc.to_file("images/xmas_tree_wordcloud.png")

# show
plt.figure(figsize=[20,10])
plt.imshow(wc, interpolation='bilinear')
plt.axis("off")
plt.show()

Solution to Exercise 2
# read text
text = open("data/xmas_jackie.txt").read()


tree_bulbs_img = np.array(Image.open("img_dir/christmas_tree_bulbs.jpg"))
wordcloud_bulbs = WordCloud(background_color="white",
                            mode="RGB",
                            repeat=True,
                            max_words=1000,
                            mask=tree_bulbs_img).generate(text)

# create coloring from image
image_colors = ImageColorGenerator(tree_bulbs_img)
We will overlay the wordcloud image now with the picture including leaves:
tree_bulbs_img = Image.fromarray(wordcloud_bulbs.to_array())
tree_bulbs_leaves_img = np.array(Image.open("img_dir/christmas_tree_bulbs_leaves.jpg"))
tree_bulbs_leaves_img = Image.fromarray(tree_bulbs_leaves_img)


new_img = Image.blend(tree_bulbs_img,
                      tree_bulbs_leaves_img,
                      0.5)

# to save the newly created image uncomment the following line
new_img.save("images/christmas_tree_bulbs_wordcloud_jackie.png","PNG")

plt.figure(figsize=[15, 16])
plt.imshow(new_img)

plt.axis("off")
plt.show()

